Showing posts with label English Paper Piecing. Show all posts

Saturday, July 25, 2020

Kaleidoscope Mini Quilt

I just love miniature quilts and can't get enough of looking at them online.  I recently picked up a miniature quilt book, Teeny-Tiny Quilts by Donna Lynn Thomas, and got a lot of good tips for working at a small scale.  I've also been attracted to the kaleidoscope quilts and made one years ago using foundation paper piecing.  That quilt is still one of my favorites and I keep it on display.

The new color strategy with kaleidoscope quilts is wonderful, adopting a mandala theme, so I tackled another.  This one I decided to do on a very small scale and using English paper piecing.  English paper piecing is not new to me, having made two throw-sized quilts in recent years, a traditional hexagon and stars quilt and the more complicated La Passacaglia quilt made popular by Willyne Hammerstein with her first in the Millefiori series.


This quilt is roughly 19 x 19 inches, so definitely in the miniature quilt category.  English Paper Piecing has always been good for getting all of those tips lined up just right and on such a small scale it fit the bill.

I used supima cotton fabrics for the solids (light blue, med/dark blue, and dark brown) because I loved the sheen, but I won't do that again, especially at such a small scale.  The fabric is very prone to fraying, with lots of super fine threads (which is what gives it the sheen), but I don't think it adds enough to the finish product to be worth the hassle.

Thursday, February 22, 2018

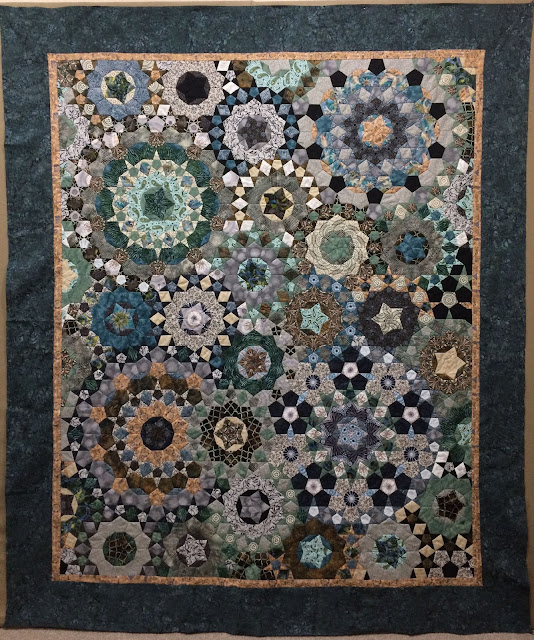
La Passacaglia - Quilt Complete (Named "Rondeau")

I'm so pleased to have completed my La Passacaglia quilt based on the design on the cover of Willyne Hammerstein's book Millefiori Quilts, an ingenious pentagon-based pattern.  I made mine using English Paper Piecing and, while she states that any method of assembly is fine, I cannot imagine trying to do this any other way.  All of those pieces coming together at a variety of angles would be a disaster for me if I tried to do this using other methods.

La Passacaglia Quilt - named "Rondeau"

Friday, December 15, 2017

La Passacaglia - Quilt Top Complete

I started working on this quilt in early 2016 (see my progress), and now the quilt top is complete!  I just love it, but my husband seems to be obsessed with knowing how many little pieces there are.  I just refuse to figure it out, but he guesstimates 2,500 pieces.  So, now it is done and I'll be pondering how I'll quilt it.  I'm trying to not overthink it and go with a large meandering or large swirl quilting pattern, or maybe something like concentric circles that mirror each rosette.  Check back to see what I settle on.  It should be soon; I already have the quilt binding (solid black) ready to go.

La Pasacaglia Quilt
La Passacaglia Quilt - Top Complete

Saturday, April 22, 2017

La Passacaglia Quilt: More Progress

I have more progress to share on my La Passacaglia quilt top that I'm working on using the designs in the awesome book Millefiori Quilts by Willyne Hammerstein.  I am down to the partial rounds that go around the edges, so I feel like I'm getting close.  But, I keep reminding myself that when I got started I was just going to play around with this technique.  I'll get there before I know it.

La Pasacaglia Quilt
La Passacaglia Quilt

Saturday, December 3, 2016

La Pasacaglia Quilt: Three More Rounds

I took stock today of my progress on the La Pasacaglia quilt rounds and realized that I'm quite behind on sharing my latest completed items.  Since my last post, I have three more rounds complete and have officially reached an edge!

La Pasacaglia Quilt
La Pasacaglia Quilt

Saturday, October 8, 2016

Celestial Flora - English Paper Piecing Quilt Complete

The last time I shared progress on my first English Paper Piecing quilt, I had finished the center of the quilt.  Now the quilt is done!  I added a small border with a tiny checkboard theme, as well as a wonderful swirl fabric as a wider border.  I named the quilt "Celestial Flora", since it has a feel that is a cross between flowers and outer space.

Celestial Flora Quilt
The quilting isn't visible in this image, but the center is quilted with double lines at various angles.  The checkerboard elements are quilted with straight lines that go out into the outer border, both on the side and at the borders.  I duplicated the hexagon flowers on each corner and filled in between with medium sized swirl filler.

Needless to day, I'm hooked on English Paper Piecing since I'm now knee-deep into a La Pasacaglia quilt!

Below are some close-up pictures of some of the quilting detail.  The quilting was done with a standard home sewing machine using variegated embroidery thread in the center and monofilament thread on the border.

Friday, October 7, 2016

La Passacaglia Quilt: Ten Rounds Complete

I have now complete 10 rounds or rosettes for my La Passacaglia quilt.  I'm so enjoying this project, making no particular decisions from one round to the next except to try not to duplicate one I've already made.  Sometimes I'm surprised at how a choice turns out differently than I expected!

La Pasacaglia quilt - Ten Rosettes
La Passacaglia quilt - Ten Rosettes

Saturday, July 16, 2016

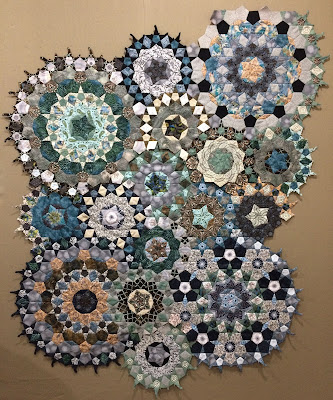
La Passacaglia - Three More Rounds

I've made more progress on my La Passacaglia quilt project, having added three more rounds or rosettes to the collection.  I'm working on another large round that I'll share when it is done, but you know how long these can take.

La Pasacaglia Quilt - In Progress
La Passacaglia Quilt - In Progress

Earlier this month I had the opportunity to share English Paper Piecing with my sister, so my next round will start with the center star that she started!

I'm having fun with the color play with this project, discovering how differently the same fabric appeals to me based on the size of the piece it is used in.  For example, that orange-y fabric in the large round at the lower left is one I added to the mix because I like to have some gold-ish color fabrics in multi-color quilts.  Separately, I like the fabric, but I wasn't really wild about how it looked in that particular round; I think there is just too much of it.  But check out that fabric in the stars around the rosette at the top right; it looks great as the points of the stars!  I like it so much, I'm going to use it again for star points and will also use it for the long diamond shapes.

Check out all of my progress on the La Passacaglia quilt project.

Sunday, May 29, 2016

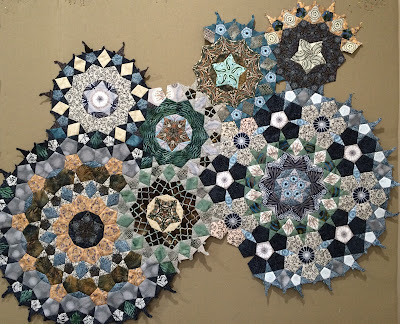
La Passacaglia Quilt - More Progress

I completed my fourth round, cog, rosette (whatever you want to call it) for the La Passacaglia quilt.  Continuing in my quest to complete this ingenious pattern using English Paper Piecing, I'm finding the fussy cutting to be the most tedious.  I think I need to spend less time worrying about where to cut and just cut from the same place in the fabric pattern and let serendipity happen.

La Pasacaglia - My Fourth Round
La Passacaglia - My Fourth Round


Sunday, May 8, 2016

La Passacaglia - Third Round

My progress on the La Passacaglia project continues and I'm really enjoying the process.  Here is my third Rosette or Round.

La Pasacaglia - Another Rosette
La Passacaglia - Another Rosette

Sunday, March 27, 2016

La Passacaglia - My Second Round

About a month ago, I shared my first round or rosette of the La Passacaglia quilting endeavor, so here is my second!  Following along with some of the images I can see online (I haven't gotten the book, yet), I made this one larger, with several more rings around it and with a "bite" taken out for my first one to "sit in".


Saturday, February 20, 2016

La Passacaglia - The Mania Begins

As promised in my previous post in English Paper Piecing, here is the first medallion (or rosette) in my venture into La Passacaglia.

La Pasacaglia - Number 1
La Passacaglia - Number 1
This is also my first time doing any fussy cutting, which seems to be almost a must for this pattern.  I fussy cut the center 5-point star, the 10 brown pentagons around, as well as the 5 light gold diamonds, although it's difficult to tell on those.  It's definitely the sort of thing that I'll keep to a minimum, as it does add extra time to the process.  Plus, the fabric has to lend itself to the purpose.

I'm pleased with the first one here and am well into the second one, which will be larger, consisting of several more "layers" around.

Until, next time!

Saturday, January 30, 2016

English Paper Piecing - Milestone

I've come to the edges on my English Paper Piecing trial run!


You can see my journey so far with English Paper Piecing.

I'm very please with how it is turning out.  This is about 42" x 36".  Now I'm working on the border, that I'll do by machine.  I am incorporating more of the medium gray used in the two medallions at the top and bottom center, along with some 1/2 inch checkerboard bits.  I'll finish it off with a sash of the light gray fabric and am still contemplating how I'll bind it.

Now that all of my handwork is complete on this, I'm diving into the La Pasacaglia mania!  Having fun so far and will share my progress soon.

Wednesday, October 28, 2015

English Paper Piecing Progress

Earlier this year I shared my new interest in English Paper Piecing.  Well, I'm obsessed now!  I'm plotting my next move into working on a Passacaglia quilt.  But until then, here is more of I started.


Sunday, March 29, 2015

English Paper Piecing - Progress

Back in January I shared my thoughts on English Paper Piecing, something I started after being drawn into what I had been seeing from others online.  I continue to work on it a little at a time, so I thought I'd share my progress.

English Paper Piecing

In my previous post, I hadn't started putting the "stars" and "flowers" together in any sort of pattern, so since then I decided to add some white space between.  I love how the collections take on different shapes as you get them assembled.  Clearly the "flowers" stand out, but sometimes, the "stars" turn into tumbling blocks where they are joined to a white diamond.

I think I've decided to leave the basting stitches in place for the finished product.  I like how it helps to keep the overall piece laying flat.  The one exception may be the center of the flowers and the white hexies.  I still do have an idea that there should be some fabric overlap to help prevent the batting fibers from poking through, and by releasing the basting stitches and pressing the allowances outward, then many of the seams will have a backing.

Now, how big will I go with this project?  I still don't know.  What I'm considering next is changing up the layout a bit to keep it interesting!

Sunday, January 18, 2015

English Paper Piecing

For several months now I keep getting drawn into research on English Paper Piecing (EPP).  So, I finally decided to dive in.  I've done a lot of hand-sewing over the years, but it has never been something I particularly enjoyed.  I think I may be a convert!


Read on for some tips and pointers.