 |
| La Pasacaglia Quilt |
Saturday, December 3, 2016
La Pasacaglia Quilt: Three More Rounds
I took stock today of my progress on the La Pasacaglia quilt rounds and realized that I'm quite behind on sharing my latest completed items. Since my last post, I have three more rounds complete and have officially reached an edge!
Friday, November 11, 2016
Charms Quilt for Baby Vivian
I've never purchased a charms pack, but have always wanted to try some of the cute, quick projects. The beauty of a charms pack is that you get a wide variety of coordinating fabrics, without having to purchase individual cuts of fabric. When a co-worker had a baby, I decided I'd give it a try.
Verdict? Love it!
Verdict? Love it!
Sunday, October 23, 2016
Garden Fence and Star Puzzle: Blue & White Sampler Quilt Blocks
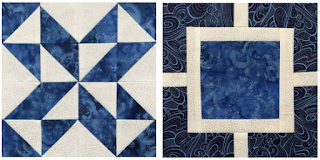
I completed two more blocks for my Blue & White Sampler Quilt, Garden Fence and Star Puzzle.
 | |
| Star Puzzle and Garden Fence Quilt Blocks |
Saturday, October 8, 2016
Celestial Flora - English Paper Piecing Quilt Complete
The last time I shared progress on my first English Paper Piecing quilt, I had finished the center of the quilt. Now the quilt is done! I added a small border with a tiny checkboard theme, as well as a wonderful swirl fabric as a wider border. I named the quilt "Celestial Flora", since it has a feel that is a cross between flowers and outer space.
The quilting isn't visible in this image, but the center is quilted with double lines at various angles. The checkerboard elements are quilted with straight lines that go out into the outer border, both on the side and at the borders. I duplicated the hexagon flowers on each corner and filled in between with medium sized swirl filler.
Needless to day, I'm hooked on English Paper Piecing since I'm now knee-deep into a La Pasacaglia quilt!
Below are some close-up pictures of some of the quilting detail. The quilting was done with a standard home sewing machine using variegated embroidery thread in the center and monofilament thread on the border.
 |
| Celestial Flora Quilt |
Needless to day, I'm hooked on English Paper Piecing since I'm now knee-deep into a La Pasacaglia quilt!
Below are some close-up pictures of some of the quilting detail. The quilting was done with a standard home sewing machine using variegated embroidery thread in the center and monofilament thread on the border.
Friday, October 7, 2016
Goose in the Pond Block - Blue & White Sampler
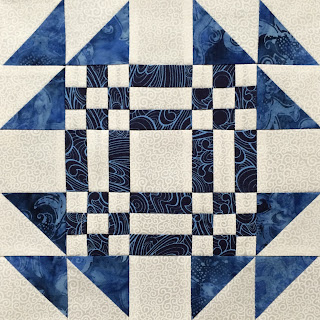
I haven't done much lately on the Blue & White Sampler I have in progress, but I realized that I hadn't posted my latest block, Goose in the Pond. This is a 10 inch block that I really like. The little 9-patch blocks are so cute! The block is perfect for the 10 inch size because it uses a 5x5 grid, so each mini-block is 2 inches square.
I found this block on Generations Quilt Patterns site, where the instructions are spot on. They don't mention the 10 inch size, but have measurements for 7 1/2, 15, and 30 inch blocks. Switching to the 10 inch size isn't to difficult.
See more of my finished blocks for my Blue & White Sampler quilt on this blog.
 |
| Goose in the Pond Block - Blue & White Sampler |
I found this block on Generations Quilt Patterns site, where the instructions are spot on. They don't mention the 10 inch size, but have measurements for 7 1/2, 15, and 30 inch blocks. Switching to the 10 inch size isn't to difficult.
See more of my finished blocks for my Blue & White Sampler quilt on this blog.
La Passacaglia Quilt: Ten Rounds Complete
I have now complete 10 rounds or rosettes for my La Passacaglia quilt. I'm so enjoying this project, making no particular decisions from one round to the next except to try not to duplicate one I've already made. Sometimes I'm surprised at how a choice turns out differently than I expected!
 |
| La Passacaglia quilt - Ten Rosettes |
Thursday, October 6, 2016
Farmer's Wife Quilt Assembly: Blocks on Point with Sashing
We finished our quilt blocks and I know you've been spending a lot of time admiring your blocks, but it's time to get down to the assembly.
Maybe you've even started deciding how you want to arrange the blocks, making sure that you have a nice distribution of the blocks based on value, color saturation, similarity, etc. If you haven't, you'll want to be thinking about this step. Once you get a good arrangement, be sure to take a picture so you can reference that when all of your blocks become a jumble again!
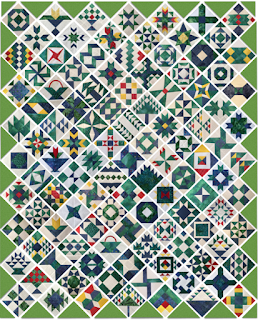
In this post, I'll give you the steps you need to assemble your quilt top using the traditional Farmer's Wife Quilt layout. This has the blocks set on point with sashing between, "posts" at the corners of the blocks, and triangles around the edges to square things off. During your internet surfing, you'll see other ideas on how to lay out the quilt blocks and some of this may apply to those ideas.
 |
| Farmer's Wife Block Layout |
Subscribe to:
Comments (Atom)
