Verdict? Love it!
 |
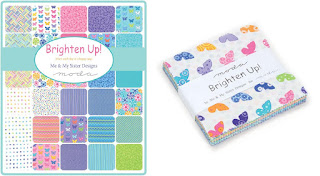
| Moda Brighten Up! Charms Pack |
I chose the Moda Brighten Up! charms pack that includes 42 five inch squares. This pack seemed perfect for a girl's baby quilt with the bright colors and bits of pink and purple. I added the following:
- about 1/2 yard of plain white fabric from my stash
- 1 yard of Blues Clues Vines, also from my stash, for the back
- crib sized Quilter's Dream batting
- 1 package of 2" Satin Blanket Binding in blue
 |
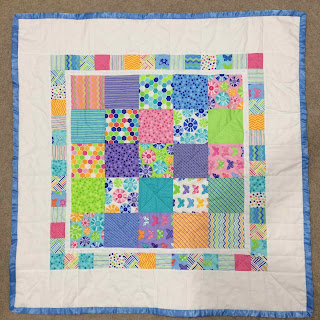
| Baby Quilt using a Charms Pack |
My inspiration came from a variety of similar quilts I've seen online, including this Pinterest pin. That pin doesn't direct to a valid page anymore, so I'll provide some brief instructions. My measurements are likely a little different.
There is a 5x5 grid of the 5" squares (25 squares) in the center. Then 3/4 inch white strips are added around the center (cut 1 1/4 inch wide strips). Next take 13 of the remaining squares and cut each one into four 2 1/2 inch squares, yielding 52 small squares. These squares are sewn together in strips (2 strips are 14 squares long and 2 strips are 12 squares long), which are then sewn as the next layer. Finally, 5 1/2 inch white strips are sewn as the outer border. The completed the quilt top should be 38 1/2 inches square.
 |
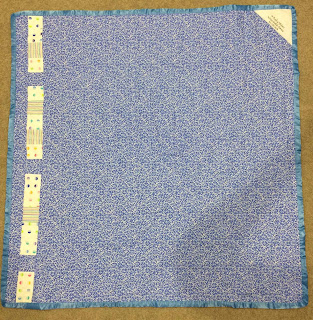
| Baby Quilt - back |
For the backing, since I used one yard of fabric, it was a little short, so I cut the remaining 4 charms into fourths, as above, to get more 2 1/2 inch squares, added three squares from the backing fabric, and sewed them together into a 38 1/2 inch strip - you'll need 19 squares. Then I cut the backing fabric - you could do this anywhere across the width of the fabric - and inserted this strip.
My quilting was done using a walking foot and only straight lines. In the middle of the quilt I did diagonal lines intersecting the corners of the blocks, then I did the same through the smaller block. Finally, I quilted straight lines out from the seams of the small blocks.
I created my label, which you can see in the upper right corner - gotta have a label! I make this from a square of fabric, folded in half on the diagonal, raw edges along the raw edges of the quilt, and hand sew the folded edge down. This should be added after the quilt is quilted, but before the binding is added. Note: If you use the backing fabric as self-binding, then this type of label doesn't work.
I've never used the satin blanket binding as the binding of a baby quilt, so something else new here. I've only ever seen this applied in one layer, basically wrapped around the raw edge of a blanket and zig-zagged in place. I remember blankets with the satin edge from my childhood and I love the feel, so I thought I'd try it out. The corners were a little difficult to miter, but it came together very similar to using cotton bias binding. I'll do this again.
This quilt came together so quickly and I love how the coordinating fabrics give it a dimension that makes is seem more complicated than it is.
