 |
| Quilt Labels |
1. Supplies
The supplies you'll need are fairly simple - fabric, waterproof pen, computer/printer or paper/pen.Fabric for the label. There are three important things to consider when choosing the fabric for the label; color, print, and quality. It needs to be a light colored fabric without much of a print on it. The key is that you don't want a print to get in the way of the words you'll be adding. Also, you'll need to be able to see through the fabric to transfer the text (more on that later). If your quilt is mostly dark, maybe you have a light colored fabric in your stash you could use that coordinates. The quality of the fabric is important because you have to be able to write or draw on it. A tightly woven, smooth fabric is best, especially for your first label. Writing on bumpy or loosely woven fabric can be difficult and you'll want to save attempting that until you've done this a few times. You can practice just drawing on a scrap of fabric, if you have some, to see how well the pen moves across the fibers. A test is also important because some fabrics allow the ink to bleed out along the fibers. If this occurs, you'll want to choose another fabric for your label. I've completely started over once I realized I couldn't get a clear line.
A pen (preferably black) that is waterproof, colorfast, fade-proof, archival, etc. and has a very fine tip. I like the Zig Millenium pens and they have a 5-pack that contains various size tips.
Optional printer and computer to create the text. If you don't use a printer, you'll need to write or draw out your text on paper. Either way, black text on white paper works best.
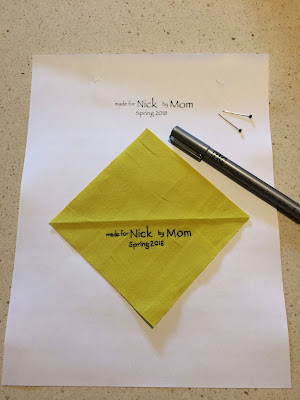 |
| DIY Quilt Label Supplies |
2. Design
There are several things to consider when designing your label; size, shape, orientation, text layout, etc.My preference is to fold a square in half diagonally, so you have a triangle with one folded edge and two raw edges. This can be placed on one corner of the quilt with the folded edge hand or machine sewn down and the raw edges captured in the binding. I like this method because it doubles up the fabric to help keep darker fabric from showing through and there are no folded seam allowances that show through along the edges.
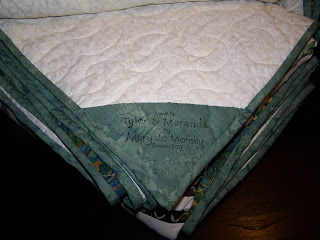 |
| Corner Quilt Label |
I have also made square "patches", similar to making a pillow cover. This has the benefit of providing turned under edges and doubled-up layers. Sometimes this becomes a necessity because I'll forget to add the label until after I've added the quilt binding. I like to hand sew the label on all four sides, but you could machine stitch it if you aren't concerned about those sewing lines showing on the front of the quilt. On the quilt below, you can see I used a patch label because I folded over the backing fabric to bind the quilt.
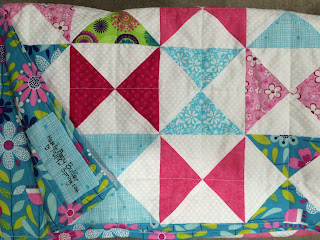 |
| Patch Quilt Label |
Once you have decided what type of label you will use, the placement of the text is next. You'll need to make sure you understand the size of the area you want to fill OR you may need to reconsider the size of your label to accommodate the size of your text. I like to include on my labels the name of the recipient, my name, and the date, keeping the date smaller than the other items.
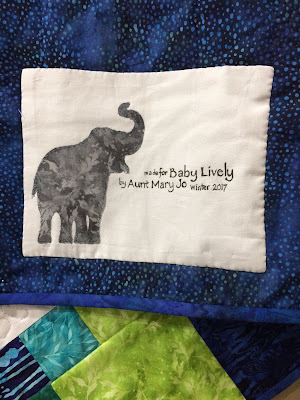
Optionally, you might decide to add a little embellishment to your label. Maybe you have a little something left over from the quilt top that you could add here. Below you can see the cute little elephant I added to the label; this was left over from the quilt front when I didn't blow up the elephant large enough and I didn't realize it until I had already cut it out!
 |
| Elephant Quilt Label |
3. Process
The basic process is to create the label text using whatever method you choose. I prefer to use a computer and printer, creating the text using a word processing software like MS-Word or Pages for Mac. This gives me the freedom to use different fonts (my current favorite is Papyrus) for different effects. For example, perhaps you might use a fun, whimsical font for a baby quilt label, but you might use a more traditional font for a vintage quilt sampler label. Also, the software has rulers on the top and side of the page so you can see how wide and tall your text will be once printed.If you don't have a computer or printer, you can write out or draw your text. Be sure it is properly sized and dark enough to see through the fabric.
Once you have your text on paper, place one layer of the fabric over the text, positioned where you want to do the transfer. Pin the fabric to the paper and hold it up to a window that has a lot of light coming through (if you have a light table, even better!). If you cannot see the text well through the fabric, you may need to darken the text on the paper a bit. But don't worry if it isn't completely visible; we'll touch it up later.
Using the waterproof pen, trace the text onto the paper, being careful to not shift the fabric as you go. Sometimes, a dotting motion works well for particularly slippery fabric. Don't worry about the details at this point, just get the basics for each letter drawn on.
Next moved to a well lit desk or table and remove the fabric from the paper. Here you can touch up the text to be sure you got all of the little nuances of the font transferred to the fabric. Sometimes you may also need to "fill in" the text by holding the pen tip on the fabric to allow the ink to soak into the fibers. Don't hold it there too long, though; you don't want a blotch!
Depending on the type of pen you use, you may need to set the ink with an iron, but these Millenium pens don't require it. I've washed my quilts and dried them, and the text still looks good.
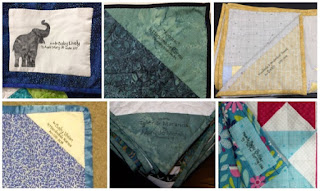
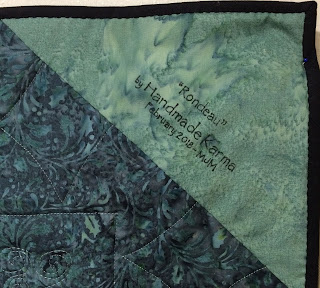
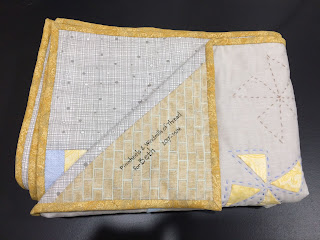
Here you can see details of a few more!
 |
| Quilt Label |
 |
| Quilt Label |
No comments:
Post a Comment